Project & Insights
How do you waterproof a concrete elevator pit?
August 17, 2026
By Boris Gopka, Owner, JSW Waterproofing — elevator pit waterproofing across Toronto and the GTA
Waterproofing a concrete elevator pit runs in a fixed order: clean the pit mechanically, fix the floor slope and the drain, treat the cold joint at the floor and wall corner, repair the wall cracks, then coat the whole pit in one continuous application. Skip a step and you find out which one later.
More than half of the pits we open need work at the cold joint and that is the part that decides whether the job holds.
Start by cleaning the pit — but not with water
An elevator pit has to be cleaned of sediment, oil, contaminants and debris before any repair starts, and the first instinct — get a power washer in there — is the wrong one. Power washing saturates the concrete. Saturated concrete prevents proper adhesion and prevents proper curing, so everything applied afterwards is compromised before it goes on.
Cleaning is mechanical. Sweepers and grinders take the contamination off without putting water into the slab.
Grinding also tells you when you are done, if you watch the colour. Concrete that still has oil in it looks different from clean concrete, and the change is visible as the grinder cuts down through it. Hydraulic oil — the kind used in the elevator’s braking system — is the difficult one, because it is fine enough to seep deep into the concrete pores, considerably deeper than mechanical oil. All of it has to come off the surface before anything else happens.
Check the drain and the floor slope
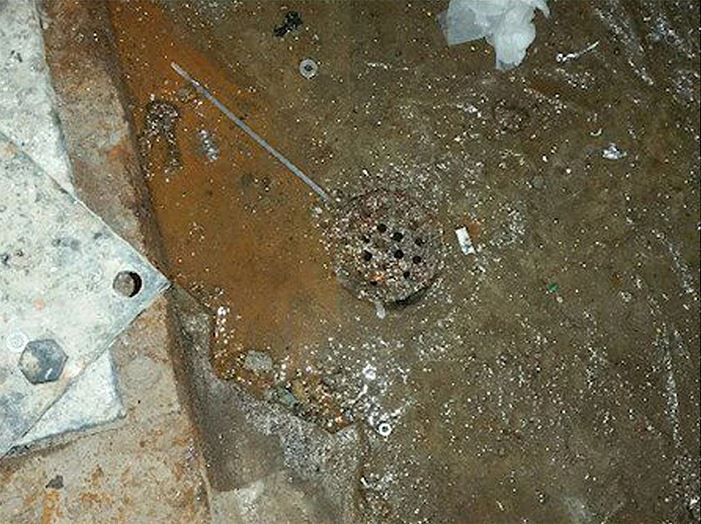
Before touching the walls, establish whether there is a drain, where it is, and whether the floor actually falls toward it. We roll a golf ball or a cue ball across the pit floor — an unglamorous test that reliably finds floors sloping up before they slope down, which leaves water ponding in one corner while the drain sits dry in another.
Correcting that takes two materials in sequence. Where the floor has valleys in it, flood it with Sika Level first to get a genuinely flat surface. Then apply Versa Speed over the top to build the fall toward the drain — in section it forms a shallow triangle. Doing it the other way round, or trying to build slope directly over an uneven floor, does not produce an accurate fall.
This is also the point to service the drain itself and, where the sump pit backs up into the pit, to fit a backflow preventer into the drain line.
Look for what is in the way
Two things block the work and both are better found now than halfway through.
Piping running along the floor and wall area is the first. Some of it carries pressurised oil to the elevator equipment, and where it sits tight to the wall it blocks access to the cold joint — the one thing in the pit most worth waterproofing. Moving pressurised lines means depressurising the whole system and draining the oil, which is costly. The alternative is working the joint a foot at a time with very small tools, a sort of toothbrush approach, which is slow and expensive and only worth doing when there is no way round it.
The second is water under the steel beam on the pit floor. If water is coming up from beneath it, the floor was likely punctured during equipment installation, and the beam has to come out. That is the elevator company’s work — they remove it, we waterproof underneath, they reinstall. We once sealed around a beam in place instead. The water built enough pressure to burst out from under it and eroded the concrete at the beam while doing so. Not a repeat.
Treat the cold joint
The cold joint where the floor meets the wall is the most important seam in an elevator pit, and it gets a specific treatment rather than a coat of anything. Rout the joint, making a wedge cut as you go. Inject concrete adhesive into the rout. Patch it with a specialty thin-patch cementitious powder mixed with adhesive.
Then the part that makes it last: a triplex application over the joint. Adhesive on the concrete, fiberglass, then a second layer of adhesive. The fiberglass reinforcement is there because floor and wall move relative to each other — cold joints are mobile, and a rigid repair over a moving seam is a repair with a countdown on it.
The fiberglass runs about a foot out onto the floor, crosses the corner, and turns up the wall. One foot up is standard; two feet is a common client request, and we have gone to three where the elevator company’s own spec called for it. That vertical run is the upturn.
On two double-bay pits at a mid-rise on Bronte Street in Milton the joint was run as a continuous patch at a 45-degree angle around the entire perimeter of both pits, with a two-foot upturn and a pigmented coating over floor and wall.
Repair the wall cracks
Wall cracks in an elevator pit are routed, injected with adhesive, and patched with a polymer cement thin enough to apply in a shallow layer, then the area around the patch is sealed with adhesive to equalise the load across the repair.
What decides whether a crack gets injected at all is a sounding test, not its appearance — hollow concrete has to come out and be patched instead. What the staining around the crack tells you is worth reading before authorising this part, because inject-versus-patch is the difference between a small line item and a large one.
Where water is actively running out of a crack, none of this works until the flow is stopped first. That is a separate technique with a four-hour window.
Coat the pit in one continuous application
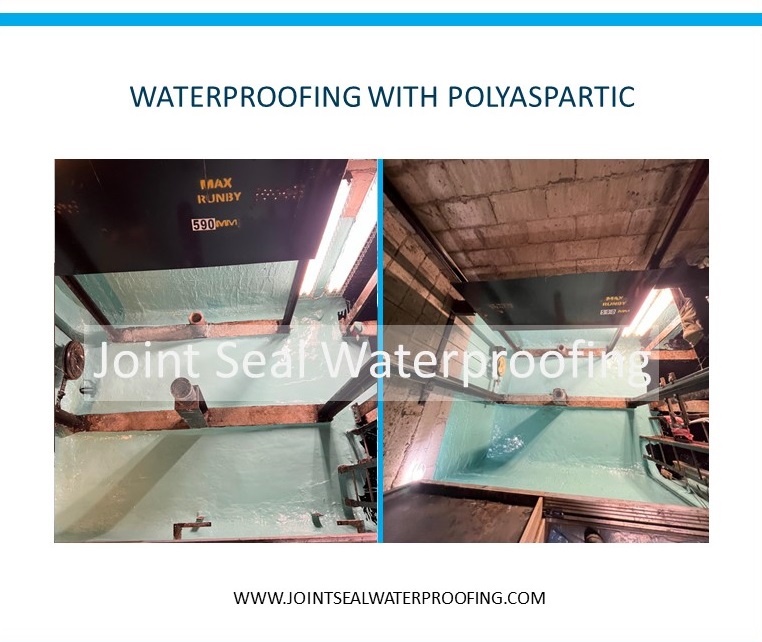
The floor and walls are coated together in a single monolithic application of Deckhide, a polyurea material that stays flexible and bonds hard to concrete. Because the walls and floor go on in one pass and cure at the same time, the coating has no seams in it — no cold joints of its own.
That is the whole logic of the pit system. The pit leaks because of a cold joint in the original concrete, so the repair does not build any new ones. The coating seals and equalises the surface as one piece.
We finish pits with a turquoise floor and white walls, and both are deliberate: nothing else in a pit is turquoise, so any future stain or crack is instantly visible and photographs cleanly, and white walls do the same for water tracking down from above.
What a property manager should expect
Ask for the sequence in the quote, and check the cold joint detail is in it.
A pit quote that goes straight to “apply membrane” without routing and reinforcing the floor-to-wall joint is quoting the easy half of the work. The joint is where more than half of pits fail. Ask what the upturn height is, ask whether the floor slope is being corrected or ignored, and ask what happens if the grinding reveals oil deeper than expected — the answers move the price, and the ones that do not get asked are the ones that come back as extras.
Book a JSW inspection · More on elevator pit waterproofing and polyurea membranes
Common questions
Frequently asked questions
Why can't you power wash an elevator pit before waterproofing it?
Power washing an elevator pit saturates the concrete, and saturated concrete will not let a coating bond or cure properly. It is the obvious first move and it is the wrong one. The pit is full of sediment, oil and debris that all has to come out, but it comes out mechanically — sweepers and grinders — not with water.
What is an upturn in elevator pit waterproofing?
An upturn is the part of the waterproofing that continues from the pit floor up the wall, past the cold joint, so the seam is covered from both sides. The standard is one foot up the wall, and clients regularly ask for two. The fiberglass reinforcement starts about a foot out on the floor, crosses the corner, and turns up the wall.
What is a monolithic coating and why does it matter in an elevator pit?
A monolithic coating is applied to the walls and floor in one continuous pass so the whole surface cures at the same time, leaving no seams within the coating itself. It matters because every seam is a potential water path — the reason the pit leaks in the first place is a cold joint in the original concrete, and there is no sense building new ones into the repair.
How do you know when the concrete is clean enough to coat?
You read the colour of the concrete as you grind it. Oil-contaminated concrete looks different from clean concrete, and the change is visible as the grinder cuts through the contaminated layer. Hydraulic oil is the difficult one — it is fine enough to penetrate deep into the concrete pores, considerably deeper than mechanical oil, so more has to come off.
What happens if there are pipes running along the pit floor and wall?
Pipes running close to the floor and wall corner block access to the cold joint, which is the single most important thing to waterproof in an elevator pit. Where those pipes carry pressurised oil to the elevator equipment, moving them means depressurising and draining the system. The alternative is working the joint in small sections with small tools, which is slow and expensive but sometimes the only route.
Related services & repair types